Kettle Bread

Rebbetzin

Almost Self-Reliant
Joined
Jun 26, 2009
Messages
707
Reaction score
17
Points
142
Location
Tucson Arizona USA
This week I checked a very nice Bread book out of the library. Yesterday I tried one of the recipes out of the book.

It is "My Bread" by Jim Lahey

http://search.barnesandnoble.com/My-Bread/Jim-Lahey/e/9780393066302

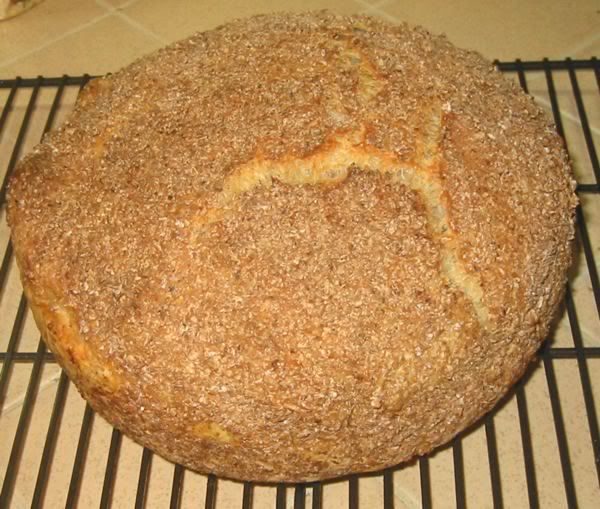
The recipe uses an iron kettle, preheated in a very hot oven, then the bread is baked at a very high heat. The crust is crisp and the interior is soft and chewy! It was great!! I will be using this method again in the future to be sure!!

Here is a photo of the bread hot out of the kettle.
72810KettleBreadTopemail.jpg


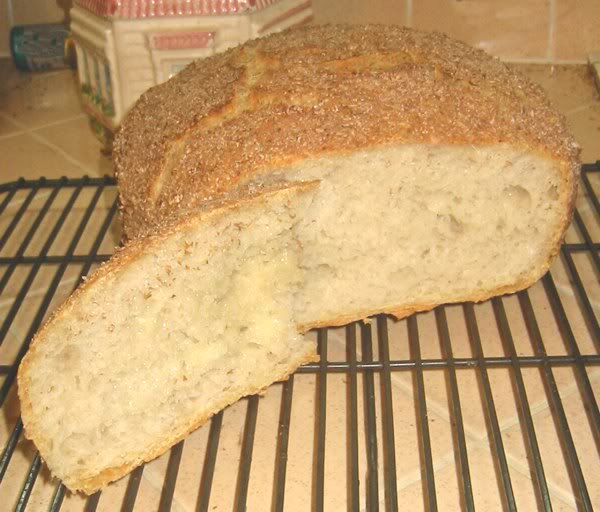
Here it is sliced so you can see the interior. Notice the two bites taken out of the slice! After tasting it I decided I wanted a photo with the slice in it.
72810KettleBreadOpenemail.jpg


The dough is coated with wheat bran for the second rising. Then more wheat bran is sprinkled on the top before putting it in the heated kettle. It the Bran keeps the dough from sticking to the hot kettle.

It was sooooooooooooooo good!!!
 

lalaland

Lovin' The Homestead
Joined
Dec 26, 2009
Messages
335
Reaction score
0
Points
89
Location
pine county, mn
ohhhh that looks so good! I don't suppose you could post the recipe and instructs for the kettle use, could you?
 

Rebbetzin

Almost Self-Reliant
Joined
Jun 26, 2009
Messages
707
Reaction score
17
Points
142
Location
Tucson Arizona USA
lalaland said:
ohhhh that looks so good! I don't suppose you could post the recipe and instructs for the kettle use, could you?
The recipe is easy enough, and any bread recipe would probably work with this method.

One heavy cast iron 4 1/2 to 5 qt kettle

3 cups bread flour
1 1/4 salt
1/4 tsp dry yeast
1 1/3 water
Wheat bran, corn meal or additional flour for dusting dough.

In mixing bowl stir together flour, salt and yeast. Add the water. Using a wooden spoon or your hand, mix until you have a very sticky,wet dough. If it is not really sticky, add a couple tablespoons more water. Cover the bowl, let sit at room temp until the surface is dotted with bubbles and the dough is more than doubled in size. This will take a minimum of 12 hours. (The author preferred the taste of the bread after a rising of 18 hours) The long rising time is the key to the flavor.


The recipe calls for a very long first rising, 12 to 18 hours. That would give you a more sour dough type flavor. I didn't have that amount of time.

So... I added more yeast. about 1 /12 tsp. of yeast. I let it rise for
only about 6 hours.

When the first rising is complete generously dust the work surface with flour. Using a bowl scraper or spatula to scrape the dough from bowl in one piece. You may flour your hands, to gently flold the edges toward the center to form the dough into a round shape. The dough will be quite loose and sticky. DO NOT ADD MORE FLOUR!

Place cotton or linen tea towel, (not terry cloth) on your work surface. Generously dust the towel with the bran or corn meal or more flour. Place dough in the center of the towel. dust top of the dough with more bran, corn meal or flour. Fold the towel over the dough and let rise util about doubled. If you poke the dough with your finger the dough should stay indented, if not wait another 15 minutes or so.

about 30 minutes before the 2nd rising is completed, set your oven to 450 -475 degrees. Place the cast iron, or another type of very heavy kettle with it's lid in the lower 1/3 of the oven.

Using pot holders, carefully remove the kettle from the oven, take off the lid, quickly, but carefully, and gently invert the dough from the tea towel to the VERY HOT Kettle. Use CAUTION!!

I put a bit of PAM in the kettle, That might not be a good idea, it smokes!! The bran, corn meal or flour should keep the dough from sticking.

Bake for 30 minutes with the lid on the kettle. Then remove the lid and bake 15 to 30 minutes more. Keeping watch so it doesn't burn.

Let cool approx. hour. (some interior cooking is still accomplished during the cooling process.)

The bread will be very much like commercial type French and Italian breads.

If you can find the book, it has photos for each step in the process. It is a great book!!
 

Kim_NC

Lovin' The Homestead
Joined
Feb 22, 2010
Messages
195
Reaction score
0
Points
64
Location
Mt Airy, NC
It looks delicious! The No-Knead or Artisan style breads are becoming really popular. Most of these require long rising times and baking in a preheated heavy iron kettle, duthoven, baking crock, etc.

Here's a great site with lots of recipes and instructional videos for those who want to make artisan breads at home:
http://www.breadtopia.com/bread-recipes-dry-yeast/
 
Top