Upcycled/repurposed projects (MANY)

Joel_BC

Super Self-Sufficient
Joined
Nov 21, 2011
Messages
1,284
Reaction score
318
Points
227
Location
Western Canada
This guy built a couple of quiet compressor units using old refrigeration compressors and a pressure tank and a few other parts. Says he spent only 65-70 Euros on it (that's $94 U.S., tops)! Pretty cool.

http://www.armorama.com/modules.php...le=index&req=viewtopic&topic_id=128644&page=1

I found the site by searching for pages about re-using old fridge compressors. I don't yet know much about the site it's on... possibly has other projects on repurposing, possibly not.

4407_p1000459eh0.jpg


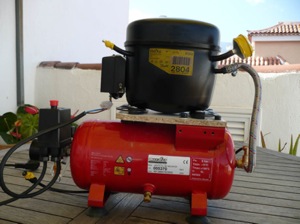
My own compressor, while extremely useful, is anything but quiet when running. :tongue (Ear protectors, bigtime.)
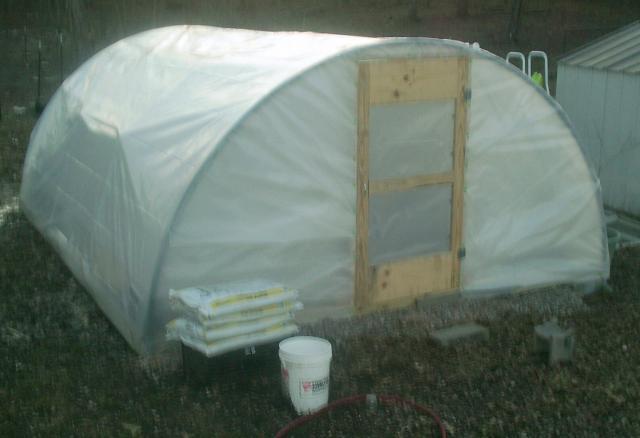
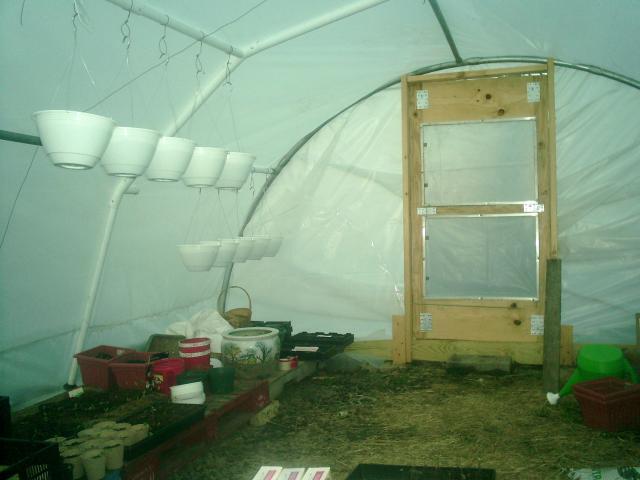
 

Jeremy_31

Enjoys Recycling
Joined
Feb 10, 2012
Messages
10
Reaction score
0
Points
21
The engineer did a really good job. If I didn't know that it was two different compressors combined into one then I never would have guessed! That's pretty awesome! Thanks for sharing it Joel!
 

Joel_BC

Super Self-Sufficient
Joined
Nov 21, 2011
Messages
1,284
Reaction score
318
Points
227
Location
Western Canada

Beekissed

Mountain Sage
Joined
Jul 11, 2008
Messages
12,774
Reaction score
3,934
Points
437
Location
Mountains of WV
Repurposed items and pics~cattle panels into a chicken coop~movable, lightweight, adaptable, durable. Stay posted for the finished coop as time goes along...should be later this week:

The next boxes' outside entrances...these frames are odd pieces of tongue in groove oak flooring that someone gave us for kindling this year. I found they make great tracks for a sliding door and will be using them on my pop door entrance also. The piece of green plastic is the bottom of the tote that I cut out and reversed, so it all worked out lovely. Where you see blocks of wood on the sliding doors, I'll be placing a regular drawer pull each.

I also repurposed a large, thick cardboard box for insulating these nest boxes. The rest of the cardboard box will be spread on the ground as the floor of my brooder setup later on...will post pics of that here as well:

5_nest_boxes_outside_entrance_2.jpg
 

Wannabefree

Little Miss Sunshine
Joined
Sep 27, 2010
Messages
13,397
Reaction score
712
Points
417
alright Joel...got my camera working here's the greenhouse project all finished up and in working order...although a bit messy.
The end hoops, are two halves of 16 foot trampoline frames, positioned on stakes of 3 foot long rebar to secure them to the ground.
The middle hoops are pieces of 16 foot swimming pool frame, screwed in to the pallets at the bottom and tied together using wire.
The plastic and wood framework was purchased. Approximately $180 total.
The door is made from purchased wood and brackets, along with reclaimed screens from the local dump.
The windows in the back are reclaimed also from said dump.
The pallets are reclaimed from my work in coordination with the local homeless shelter food distribution, as are the totes I have things planted in in the greenhouse.

All the pallets are secured together with a 12 ft 1x6 reclaimed from another job. Then the hoops have been screwed down or wired(trampoline hoops) to the pallets to stabilize the structure. Around the outsides of the pallets are 12 foot 1x6's purchased to hold the plastic down by rolling the plastic around them and then screwing them onto the pallet floor frames. I can't possibly remember all the details of how this was accomplished, so if anyone wants to ask questions, have at it. This was a pretty easy project and cost were kept at a minimum by reclaiming used components and buying only what was necessary. I think it's not too shabby ;) I am enjoying the heck out of my own little indoor garden space :D :D


2291_stuffs_002.jpg


2291_stuffs_004.jpg


2291_stuffs_003.jpg
 

Beekissed

Mountain Sage
Joined
Jul 11, 2008
Messages
12,774
Reaction score
3,934
Points
437
Location
Mountains of WV
I love one important addition to your design....the chairs!!! :D Love sitting out and watching whatever I'm growing, be it plant or animal. Great little greenhouse! Approx. how much did it cost to buy the materials for that, Wanna?
 

Wannabefree

Little Miss Sunshine
Joined
Sep 27, 2010
Messages
13,397
Reaction score
712
Points
417
Beekissed said:
I love one important addition to your design....the chairs!!! :D Love sitting out and watching whatever I'm growing, be it plant or animal. Great little greenhouse! Approx. how much did it cost to buy the materials for that, Wanna?
The plastic and purchase lumber was right at $180. Already had the chairs ;) I was gifted some gravel that is going down in the middle isle/walkway as well. And I have a large rubber mat (4x12)reclaimed from a restaurant clean up that will be going down the center for those plants to sit on as well.

Forgot to mention the size is 13x16 total interior space. I have enough plastic leftover to replace as this gets damaged. I could have gotten a smaller role cheaper, but went with the larger one on account of it will have to be replaced eventually and I had the cash to go ahead and get enough to last through one replacement of the plastic ;)
 

Joel_BC

Super Self-Sufficient
Joined
Nov 21, 2011
Messages
1,284
Reaction score
318
Points
227
Location
Western Canada
Here's a usable design for a low-cost homebuilt solar tracker for PV, using some new parts - but using what might be trash parts like old bicycle wheels, a peanut butter jar, and scap 2x4 lumber. (They caught my eye with the use of the bicycle wheels.) They claim the boost in power output to be 30-50%, as compared with a fixed-postion PV plate situation.

Scoll down the page, there's a sequence of seven explanatory photo pages, with text. Step-by-step how they did it:
http://www.instructables.com/id/Solar-PV-tracker/

If you had scrap metal and a welder around, you might choose to make the frame from that.
 
Top