Beekissed

Mountain Sage
Joined
Jul 11, 2008
Messages
12,774
Reaction score
3,934
Points
437
Location
Mountains of WV
Rebuilding and improving an outhouse here this year...

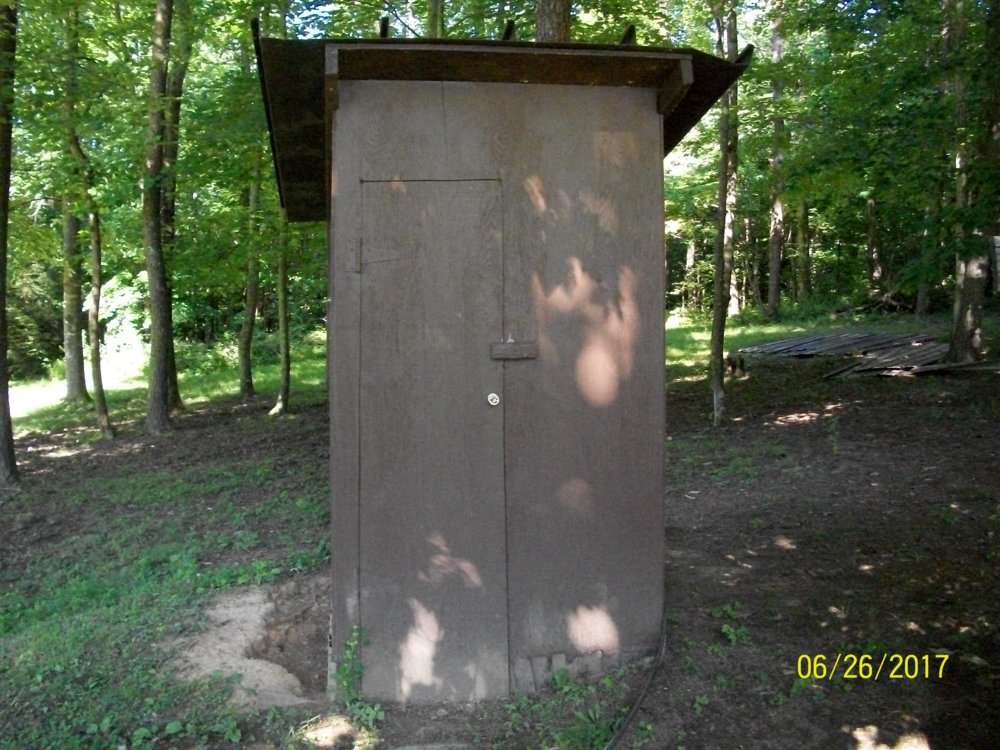
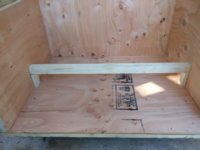
Before and during pics....this little outhouse is 25 yrs old and has an antique commode in it. We were going to reuse that commode but it cracked as they were removing it, so now it's going to become a planter.

Your basic little brown house...the floor keeps flooding in hard rains, the door sticks on the ground when trying to open it, it's claustrophobic, it doesn't have enough light and air, so we are replacing it.
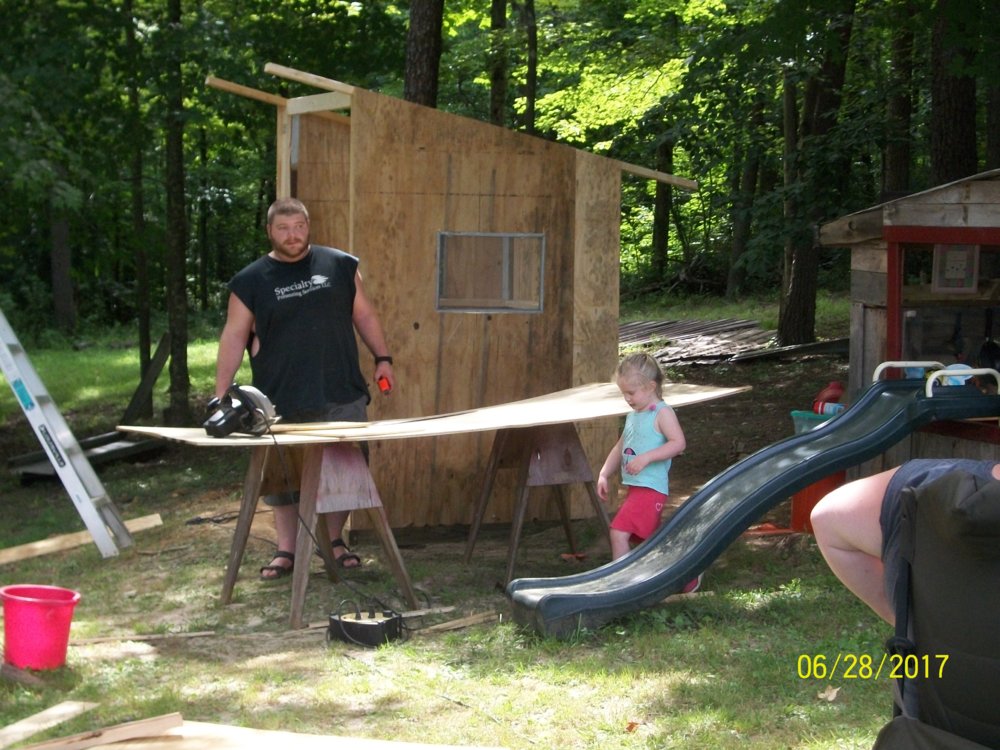
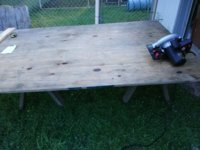
100_5824-jpg.3489

100_5825-jpg.3490

100_5826-jpg.3491


Demo begins...
100_5833-jpg.3492


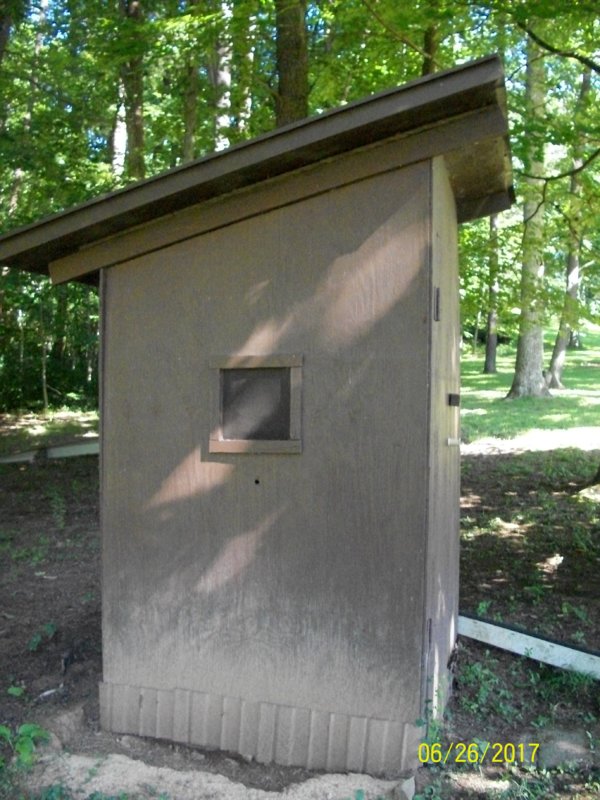
The new one faces in a different direction...this allows it to catch the prevailing winds, gives it a great view from the throne, so to speak, and is raised up on 4x4s so the runoff doesn't enter the structure.
100_5869-jpg.3493
100_5870-jpg.3494


We're trying to go as cheap as possible by reusing some materials, using materials we had on hand and also getting some free or cheap items. The window screens above were $1 ea. at the Habitat store. We were able to reuse some of the lumber from the old outhouse as well as some old 4x4s from my son's house where he took down a few old gates.

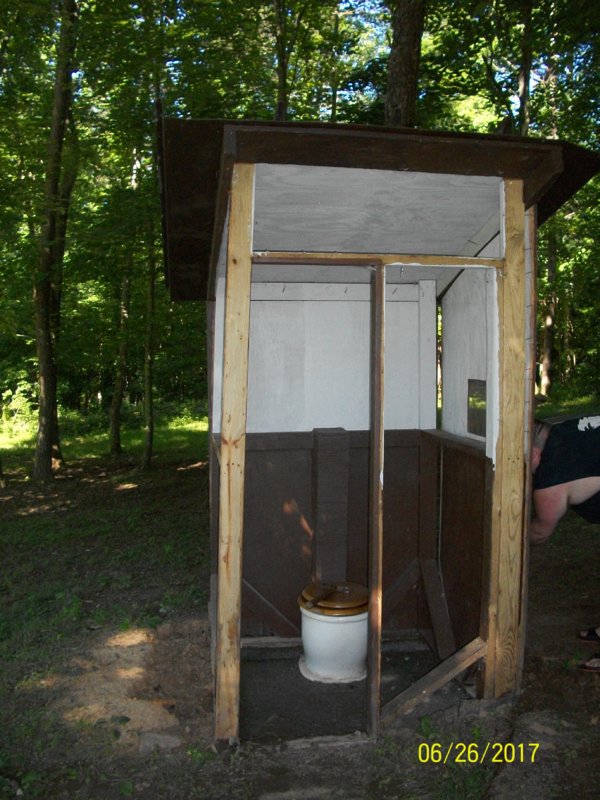
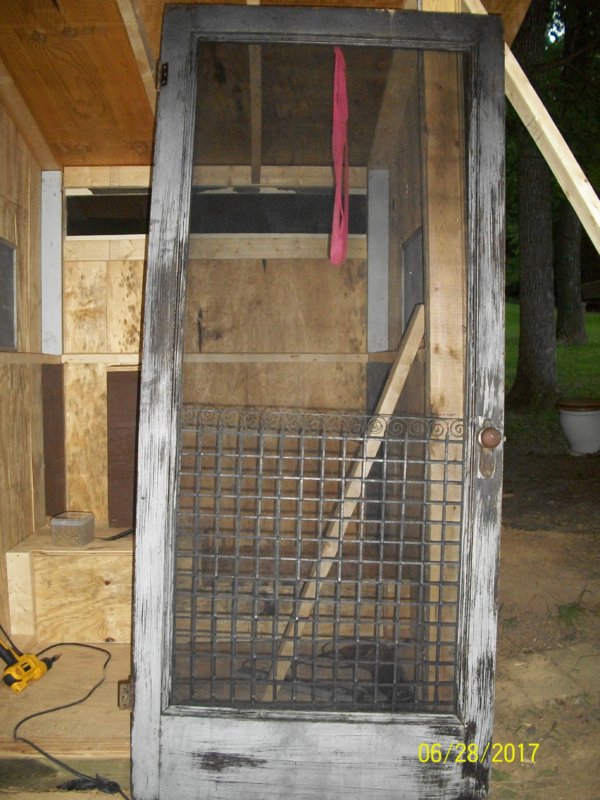
This old screen door(below) was in the basement of my brother's house that was built in the early 1900s. I love it! We were going to repaint it, but I love the patina on this door and will leave it as is. Using a screen door and blocking off the bottom half to the view of others, will give us more light and air and reduce the claustrophobic feeling of being enclosed in a room that small.

100_5871-jpg.3488


This outhouse is a two holer while the other was a single. We decided to incorporate a child's potty next to the larger one so that the grandchildren don't have to run all the way in the house when they want to go and won't feel intimidated by trying to balance on the big pot with all that dark space underneath.
 

Beekissed

Mountain Sage
Joined
Jul 11, 2008
Messages
12,774
Reaction score
3,934
Points
437
Location
Mountains of WV
Mom and I are finally able to get back to finishing out the new outhouse. Trying to level the dirt around it now to create a level entry way and prior to putting down landscaping. Will use black edging to divert runoff away from the base of the building, while also confining the lava rock to one place so the chickens can't kick it out.

Using those rubber pavers for the entry...I love those things. A bit more pricey than stone pavers but will hold up under freezing and thawing, excess traffic, and will mold more easily to uneven contours of the ground, so when the soil moves over time, they move with it but don't stick up where you can trip over them.

After this task, we'll cut some trim to cover various gaps in the plywood where things weren't quite squared and such. One whole section of the seat box I'm removing and recutting wood to fit that as my boy got in a bit of a hurry at the end and wasn't quite as diligent about his measuring. Just minor things here and there prior to the painting.

Can't wait to get it painted and done!

I know this sounds sort of crazy, but this little building has become my favorite structure on the land....it's breezy, shady, light and the new wood smells so good. I'm looking around all the time for a cute repurposing to make a magazine/book rack in there....some piece of interesting looking metal that I can use~saw some bedspring coils at the Restore store the other day and thought a couple of those mounted to the wall would hold a few magazines. Found some nice signage at Good Will the other day for a few bucks, for putting on the wall.
 

milkmansdaughter

Super Self-Sufficient
Joined
Jul 31, 2017
Messages
1,308
Reaction score
1,541
Points
217
Location
Alabama
I'm taking one of our wood boxes and am working on a small rooster roost for nighttime. I have two young roosters and separated them out into their own yard today, but they need something more secure for the night.
I ran out of light before I finished so the boys got to sleep with the girls for one more night.
But here's what I've got so far...
I took one of these boxes and took the supports off of the bottom. Then I tipped it on its side and put the 4x4s under the new "bottom". This will keep it off the ground. New top and new front off. (Had to take the back off, lower it to line it up, and reattach it.) Added a 2x2 perch across the center. Cut plywood for my new roof. Pulled out chicken wire to use in top of roof for air.
The wood boxes were free and we had everything else already here. I even reused the nails. So far if I was adding for cost, I'd be out one 2x2 (although the only new wood I used was for the perch), a half piece of plywood, and a few short finishing nails. I even found some old shingles in the shed from a previous owner!
So far the hardest part was getting those 4x4's off the bottom. The (8? per support) nails were 3" into the 4x4's! Someone had no intention of ever dismantling these boxes!
I'll try to finish tomorrow and will post more pictures.
 

Attachments

  • IMG_20170814_081203.jpg
    IMG_20170814_081203.jpg
    129.9 KB · Views: 400
  • IMG_20170819_155149.jpg
    IMG_20170819_155149.jpg
    88.4 KB · Views: 372
  • IMG_20170819_165157.jpg
    IMG_20170819_165157.jpg
    113.9 KB · Views: 400
  • IMG_20170819_171627.jpg
    IMG_20170819_171627.jpg
    116.2 KB · Views: 381
  • IMG_20170819_175731.jpg
    IMG_20170819_175731.jpg
    87.1 KB · Views: 398
  • IMG_20170819_185253.jpg
    IMG_20170819_185253.jpg
    151.2 KB · Views: 394

Beekissed

Mountain Sage
Joined
Jul 11, 2008
Messages
12,774
Reaction score
3,934
Points
437
Location
Mountains of WV
Nice looking conversion on that crate! Very cute!

We're still not completely finished with our outhouse redo as life interrupted and drew us away from the homestead for a couple of weeks and now we are playing catch up. Both mowers down for the count and both people down in health a bit too, so it's a slow catch up.

Bought more lava rock today to finish out the landscaping, new wood for trimming out the windows and door frame and also bought more paint for the exterior. Painting it to match the house and woodshed so it would blend rather than stick out like a sore thumb.

Still need to cut and put in some quarter round where the seat joins the wall and such, then paint the interior. Also need to cut and mount the eave on the back to shoot the rainwater runoff out and away from the base of the building.

Need to get it done before next week...hope to have a little company for an apple sauce/butter stir off then and have it ready in case folks want to try it out.

Found a brand new, heavy duty metal magazine rack at Good Will this week to mount up in there~$3. It has three compartments, plenty for kid's books and magazines alike. We don't do many magazines here so will be trolling the free old subscriptions at our libraries for interesting mags to place in there.

Can't wait to have that project finished so I can roll on to other projects waiting in the wings.
 

milkmansdaughter

Super Self-Sufficient
Joined
Jul 31, 2017
Messages
1,308
Reaction score
1,541
Points
217
Location
Alabama
A warm seat in the winter is definitely a bonus. :)
When we were kids, we had a big front porch with half walls that faced south. In the summer it was open, but in the winter, we covered it with that plastic. Even with frigid Wisconsin winters, that porch warmed up enough on a sunny day to open the doors to the house. We had indoor plumbing and a bathroom but also had an outhouse (a 3-seater!) It was nice on those days when we were told to stay "in OR out" I'd choose the outhouse every time over a day spent inside. :)
 

milkmansdaughter

Super Self-Sufficient
Joined
Jul 31, 2017
Messages
1,308
Reaction score
1,541
Points
217
Location
Alabama
Ooooh I can sooooooo identify! :lol:

We're getting stuff done, lots of stuff, but seems like I'm always going back to finish a project only to have to then go back again to fix my mistakes! Good thing this stuff is for us and not to sell.. my painting lately has left MUCH to be desired. And the list of things to do is far outstripping the list of things DONE. Just yesterday my husband banned me from telling him any more ideas for the foreseeable future (I'm supposed to write new ideas in a book. Lol!)That lasted about a whole 15 minutes, and then HE was delaying getting things done because he was trying out new ideas... :lol:

I bet that's the prettiest (and maybe only??) outhouse in the closest 3 counties. Funny, you're the only person I know that would have lots of willing visitors to come see your outhouse! :gig
 

Beekissed

Mountain Sage
Joined
Jul 11, 2008
Messages
12,774
Reaction score
3,934
Points
437
Location
Mountains of WV
Love it! And those are the same colors we've been using :) I really like the yellow you used for the inside. I bet it makes it bright and cheerful.

It does! Mom was unsure about that but now that she's got a couple of coats on there she's starting to see how pretty it is. In her world, outhouses are supposed to be painted brown~inside and out. That's how they've always done it...there's even a song about the "Little Brown House" regarding outhouses.

The exterior brown matches the house and woodshed, so I didn't mind that at all...I like things to blend well in the landscape.

For the interior, as for me, the last color I would want is one where bees and spiders blend in and so does crap....those are three things I don't want to sit on or near. :eek: I want to be able to SEE such things before I pull down my drawers. ;)

The seat box is going to be celery green and the window trim inside will be the same. So, white ceiling, yellow walls, light green seat, white toilet seats.

She can have it brown all she wants outside but it's going to be a cheery squatting place inside if I have anything to do with it! :D
 

Beekissed

Mountain Sage
Joined
Jul 11, 2008
Messages
12,774
Reaction score
3,934
Points
437
Location
Mountains of WV
Got some of the components of the chicken shucker mounted and situated and skinned my first bird~one of the PR birds that keeps getting out of their enclosure, even after I clipped her wing today. She was the Chosen One for a run through on the chicken shucker.

I got to see the flaws in my system right away but it does pull the skin like I desired...just needs to be more of an even pulling, as chicken skin is not as tough as deer hide. It tore in one spot and then another, so we are working out the kinks in how to prevent that.

It did yield a carcass that was virtually feather free and I didn't have to use my hands to pull on anything, so the goal was achieved, but needs refining. And, man, was that a slick ticket! Crank a few times and that chicken ain't wearin' any clothes!!

I also tried a new gutting technique I saw on YT wherein you just cut across the spine right above the hips and pull the carcass open, much like one method of skinning a rabbit or squirrel. Easy to reach the lungs and easy to remove the guts without any way of poop squeezing out of the bowels as you remove them. I liked it, but again, I need to refine it so that I get a good rhythm with this all....but still a VERY fast butcher, even with fiddling with the shucker and the new method of gutting.

I think I'm getting there......
 

Beekissed

Mountain Sage
Joined
Jul 11, 2008
Messages
12,774
Reaction score
3,934
Points
437
Location
Mountains of WV
The neck clamp portion of the apparatus was mounted up on a tree today so I could use my own body weight to apply torsion to the hide for skinning. That worked VERY well and really revolutionized my processing, so I consider this a success. MUCH quicker, much cleaner carcass, and much easier on my hands and arms.

Eureka!!! :woot
 

Beekissed

Mountain Sage
Joined
Jul 11, 2008
Messages
12,774
Reaction score
3,934
Points
437
Location
Mountains of WV
Finally got around to completing my outside sink, processing station. It's comprised of an old metal youth bed(headboard and footboard) and reclaimed/free lumber and an old single basin porcelain sink I got at the Rehab store for $4. The bed frame came from Good Will for $10.

Still have to add some bracing at the bottom, some paint and a few tweaks here and there but it's largely done. This is going to make my butchering SOOOO much easier as my current butchering station is our old picnic table, which is too low for good working and puts my back in a strain. Will post a pic when it's all finished.

It's not fancy but I'm tickled pink with it!

Next DIY is turning an old shipping crate I got at the Rehab store for $7 into a bench/potato storage for our pantry/mud room. That one's going to be really easy to just mount some legs and fashion a lid. It will be a welcome addition to the mudroom to be able to sit little girls down to remove their shoes and boots, etc. Also to have a place for potatoes...we've been keeping them in an old milk crate, which is not the best for keeping them fresh longer.
 
Top